
Guides · Home projects · Published November 18, 2026 · By Faizan Ahmad
How Many Tiles Do I Need?
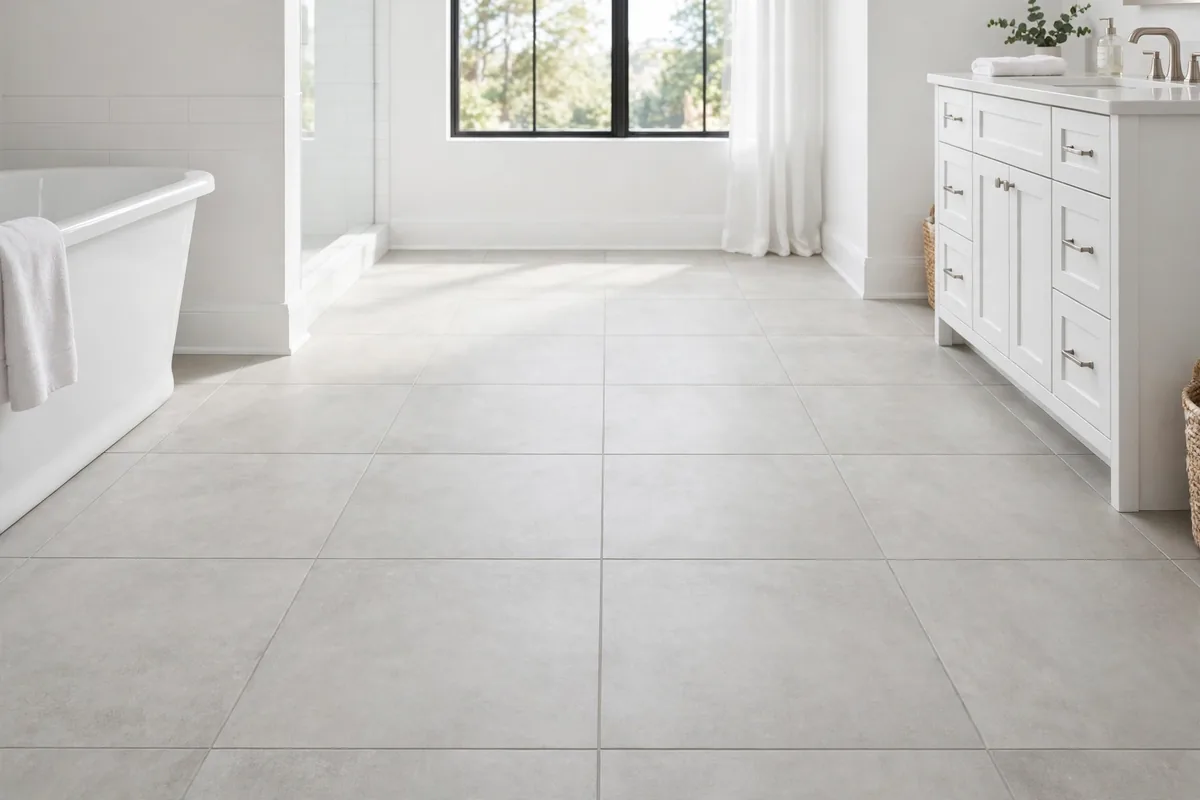
Tile is the least forgiving material to guess at. Come up short mid-floor and the replacement box may come from a different production run, with a shade that shows the moment the light hits it; come up long and you have hauled heavy boxes home and back for nothing. The fix is one division — area divided by the area of one tile — plus a waste allowance that honestly matches the pattern you are laying. That is exactly what our Tile Calculator — tiles needed with waste included runs for you. This guide shows how the calculator works, the maths underneath it, and the two things most tile guides underplay: how much the layout pattern changes the waste, and why every box you buy must come from the same batch. By the end you will be able to check any tile count — ours, a store's, a tiler's quote — against your own numbers.
The short answer, on one card
- The formula: tiles = area (sq ft) ÷ one tile's area (sq ft). One tile's area = length × width in inches ÷ 144
- Waste by layout: add 10% for a straight layout, about 15% on the diagonal, 15–20% for herringbone and complex patterns (guidance — see Step 4)
- A 12×24 in tile covers exactly 2 sq ft on paper — 288 square inches ÷ 144. A 12×12 covers exactly 1 sq ft
- Boxes round UP: divide the square feet to buy by the coverage printed on the carton, and always round up to whole boxes
- The same-batch rule: buy every box from one dye lot, check the code on each carton, and keep spares from that batch for future repairs
Step 1 — Measure the room (the longest length, the widest width)
The calculator needs the area you will actually cover, and tile starts with an honesty rule the calculator page states plainly: rooms are rarely square. Walls wander, corners drift, and a room that measures 10 feet at one end can measure 10 feet 4 inches at the other. So measure the longest length and the widest width and let those two numbers define your rectangle — the extra cuts where the walls wander are part of what the waste allowance in Step 4 is for. For a floor, that is length × width. For a wall or a shower, it is width × height, one wall at a time. Two judgement calls belong to you, not the calculator. Tile under movable appliances if the tile runs there anyway — the floor should be finished when the appliance moves. Under fixed cabinets, most tilers stop at the toe-kick and save the tile, because nobody will ever see it. And measure the whole surface before you subtract anything: a vanity footprint or a bathtub apron comes off only if it is truly staying bare, while alcoves, niches and returns that will be tiled get added back in. On a small bathroom those details are easily a tenth of the area, in one direction or the other.
Step 2 — Run the calculator: what each input does
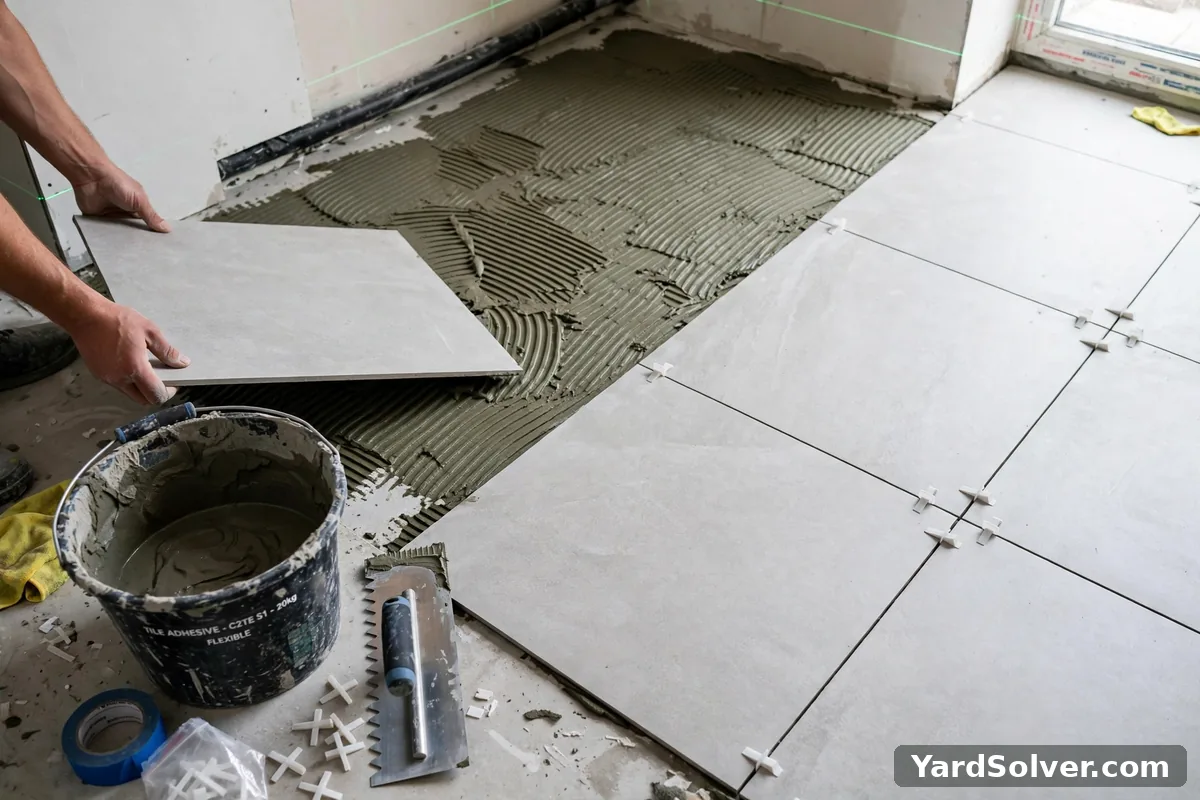
Open the Tile Calculator and type in the length and width from Step 1, in feet or in metres — the unit switch converts everything behind the scenes. Next, the tile size: the calculator lists the common ones with their coverage already worked out — 6×6 in at 0.25 sq ft, 12×12 in at 1 sq ft, 12×24 in at 2 sq ft, 18×18 in at 2.25 sq ft and 24×24 in at 4 sq ft. Then the waste percentage, which starts at 10% because that is the standard allowance for cuts and breakage in a straight layout; Step 4 shows when to raise it. Finally, your country, Canada or the USA: the tile count is identical everywhere, but the calculator prices the answer with typical mid-range tile prices per square foot for your country, so the estimate is in a currency and a range that mean something to you. The answer comes back as a tile count already rounded up to whole tiles — you cannot buy 43.6 tiles — plus the square feet to buy with waste included, which is the number the box step in Step 3 needs, and an estimated cost. Grout and adhesive are extra, and the calculator says so: they are real costs, but they are not tile. Press the print button and you have a shopping list.
Step 3 — The maths the calculator is doing, with a worked bathroom
There is no hidden model here — the calculator runs the same three-step chain every tiler runs, and you can check it on paper. Step one: area = length × width. Step two: one tile's area = its length × width in inches ÷ 144 (144 is the square inches in a square foot). Step three: tiles = area with waste added ÷ one tile's area, rounded up. Here is the calculator page's own worked example, a bathroom floor of 10 ft × 8 ft in 12×24 in tiles, straight layout. The area is 10 × 8 = 80 sq ft. Add the straight-layout waste: 80 × 1.10 = 88 sq ft of tile to buy. One tile covers 12 × 24 = 288 square inches, which is exactly 2 sq ft. Count the tiles: 88 ÷ 2 = 44 tiles. Now turn tiles into boxes the way the calculator's buying notes insist — by the coverage printed on the carton, never by a guessed tiles-per-box: if one box covers 10 sq ft, then 88 ÷ 10 = 8.8, so you buy 9 boxes, always rounding boxes up, never down. Change nothing but the pattern and the list moves: laid on the diagonal, the same floor takes about 15% waste — 80 × 1.15 = 92 sq ft, or 46 tiles. Same room, same tile, two extra tiles and possibly an extra box, purely from the angle. That is why the waste box sits right beside the tile size in the calculator, and why the next step deserves its own section.
Step 4 — Waste by layout: the pattern sets the allowance
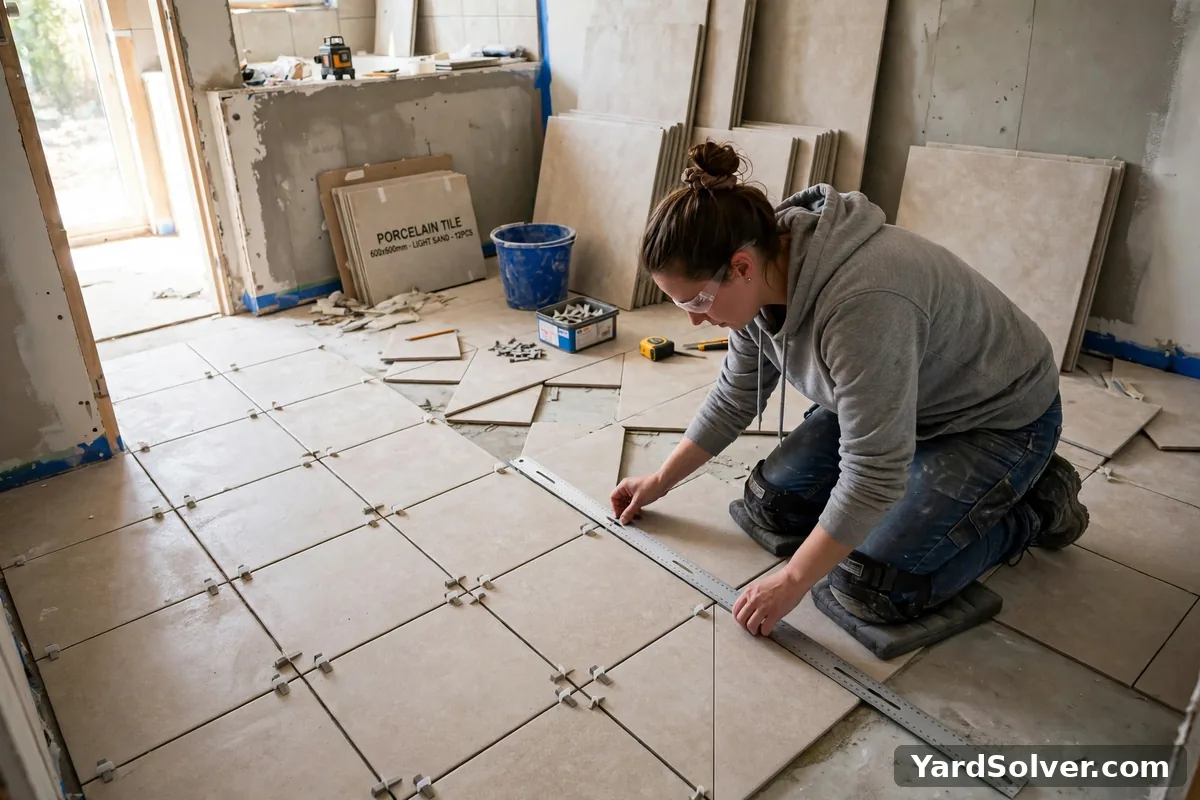
Waste is not one number — it is a property of the pattern. In a straight grid, cuts happen only at the edges, and an offcut from one side often starts the next row, so 10% genuinely covers cuts and the odd breakage. Turn the same tiles 45 degrees and nearly every edge tile is cut at an angle; the triangular offcuts rarely fit anywhere, and the allowance rises to about 15%. Herringbone and other interlocking patterns cut at both ends of most pieces and begin with a fiddly starter row, so they sit at the top of the range. The figures in this table are guidance, not a standard — installer rules of thumb that the calculator's waste box lets you apply to your own room:
| Layout pattern | Waste to add | Why |
|---|---|---|
| Straight grid or running bond | 10% | Edge cuts only; most offcuts reuse on the next row |
| Diagonal (45 degrees) | About 15% | Nearly every edge tile is cut at an angle; triangular offcuts rarely reuse |
| Herringbone and complex patterns | 15–20% | Cuts at both ends of most pieces, plus a wasteful starting row |
Two situations push a straight layout up the table on their own. A badly out-of-square room deserves 15% even in a grid, because the tapered cuts along the wandering wall are where tiles disappear. And very large tiles waste more per mistake: one broken 24×24 is 4 sq ft gone, so first-time tilers laying large format do well to take the higher figure for their pattern. Whatever you choose, dry-lay a row — or the whole pattern, as in the photo — before adhesive touches the floor. The dry run is where a pattern's true appetite for cuts shows itself, while changing your mind is still free.
Step 5 — Odd-shaped rooms: split, add, then convert once
The calculator takes rectangles; homes are full of L-shapes, alcoves and shower walls that turn corners. The method is the same one that works for every measured surface: split the shape into rectangles, measure each, and add the areas together before you convert anything. An L-shaped kitchen floor is a big rectangle plus the small rectangle of the leg. A shower is three rectangles — back wall, and two side walls — plus the floor if it is tiled too. A water-closet alcove is one more small rectangle added back, not a rounding error to ignore. The money-saving detail is the order of operations: add the square feet first, apply the waste percentage once to the total, then divide by the tile's area and round up once. Round up separately for each piece and you pay a rounding tax on every piece — on a three-wall shower that can be most of a box of tile bought for no reason. Sketch the room on paper, write each rectangle's area on the sketch, and run the total through the Tile Calculator — count for floors and walls as if it were one room of that many square feet, because for counting purposes, it is.
Step 6 — The same-batch rule: dye lots, calibre and spares
Here is the rule that separates a floor that looks made in one piece from a patchwork: buy every box from the same batch. Tile is produced in runs, and two properties drift slightly from run to run. The dye lot is the colour run — the same glaze recipe can fire a shade warmer or cooler in the next batch. The calibre is the size run — tiles from one calibre can be a fraction of a millimetre larger than the next, enough to make grout lines wander where two calibres meet. Neither difference shows in the store, where boxes sit under flat light and you never see two lots side by side across a whole floor. Both show at home, in raking daylight, forever. The defence is cheap and takes ten seconds: before you pay, check that the batch or shade code printed on every carton is the same code, and buy the whole job — including the waste allowance and your spares — in that one visit. Then keep the spares. A few full tiles from the same batch, stored flat indoors, are the difference between one cracked tile meaning one quiet swap and one cracked tile meaning a floor that can never quite be matched again, because tile lines are discontinued and a sold-through dye lot cannot be re-bought. The calculator page gives the same advice in one line — keep the spare tiles, because a discontinued tile is impossible to match later — and it is the cheapest insurance in the whole project.
What the calculator can't do
Honesty about the edges, so the number earns your trust. The calculator cannot see your walls: it assumes the rectangle you typed, which is why Step 1 measures the longest and widest points and why an out-of-square room deserves the higher waste figure. It works in nominal size — the size printed on the box — while the physical tile is usually a fraction smaller, with the grout joint making up the difference in the finished layout. That is normal, and because the maths runs on coverage the count still holds, but it is why a dry-lay should never assume the printed size is exact to the millimetre. It cannot choose your waste for you beyond the 10% it starts with: the pattern decision in Step 4 is yours, and taking the straight figure for a herringbone floor is the classic way to run out two rows from the wall. It cannot check batch codes at the shelf — that ten-second check in Step 6 is yours. And its cost figures are mid-range estimates for your country, not quotes: adhesive, grout, spacers, backer board where a floor needs it, and a cutter or cutter rental are real costs the tile count does not include. What it does guarantee is the counting chain, checked above: honest area, the right waste for the pattern, one division, boxes rounded up from the carton's own coverage.
Measuring an outdoor surface instead of a bathroom? The same split-into-rectangles habit sizes the base layers in our guide to building a paver patio base, layer by layer — different material, same discipline of measuring once and ordering once.
Keep going
Run your own room through the Tile Calculator, then read the outdoor counterpart: How to Build a Paver Patio Base sizes gravel and sand layers for the other big measured-surface project most homes take on.
Scheduling the tiling weekend around everything else the season demands? The Garden Planner lays out indoor and outdoor jobs in one calendar, so the bathroom floor and the garden stop competing for the same Saturday.
Questions people ask
How many tiles do I need for a 12×12 room?
A 12×12 room is 144 square feet. In 12×12 inch tiles — exactly 1 square foot each — that is 144 tiles before waste, and 159 tiles with the standard 10% added for a straight layout. In 12×24 inch tiles (2 square feet each) it is 72 tiles before waste and 80 with 10% added. Boxes depend on the coverage printed on the carton, so divide the 158.4 square feet to buy by that number and round up.
Why buy tiles from the same batch?
Tile is made in production runs called dye lots, and colour and exact size — the calibre — shift slightly from run to run. Two boxes that look identical under store lights can show as a visible patchwork on one floor if they come from different lots. Check the batch or shade code printed on every carton before you pay, and buy the whole job, spares included, in one visit.
Is a 12×24 tile really 2 square feet?
On paper, yes: 12 × 24 = 288 square inches, and 288 ÷ 144 = exactly 2 square feet. The physical tile is usually a fraction smaller than its nominal size — the grout joint makes up the difference in the finished floor. The calculator works in coverage, so the count still holds; just never dry-lay a pattern assuming the printed size is exact to the millimetre.
How many spare tiles should I keep?
Keep at least a few full tiles from the same batch — a full unopened box if you have the storage. Tiles get discontinued, and a dye lot cannot be re-bought once it sells through, so one cracked tile years from now should mean one swap, not a whole new floor. Store spares flat, indoors, where they cannot freeze or be knocked.
How much waste should I add for a diagonal layout?
Plan on about 15%, against 10% for a straight layout. A diagonal floor cuts nearly every edge tile at an angle, and the triangular offcuts rarely fit anywhere else. Herringbone and other complex patterns waste the most — allow 15–20%. These figures are installer guidance, not a standard: an out-of-square room deserves the higher figure whatever pattern you choose.
How do I count tiles for an odd-shaped room?
Split the room into rectangles, measure each one, and add the areas together before you convert to tiles. An L-shaped room is just a big rectangle plus a small one. Add the square feet first and divide by the tile size once — rounding up separately for each piece wastes tiles and boxes on almost every job. Add back alcoves and niches you will tile; leave out only footprints that will stay bare.
Tile counts are area divided by tile-plus-grout — the grout joint is part of the module
A tiled floor or wall is not tiles touching edge to edge; it is tiles laid on a module that includes a grout joint, commonly a few millimetres indoors and wider outside. The count therefore comes from the surface area divided by one tile's face plus its share of joint, which is why the same room needs noticeably fewer large-format tiles than small mosaics even before cutting waste is considered.
Work the calculator with the true length and width of each surface, subtract only openings that will genuinely stay untiled, and add waste honestly: about ten percent for a straight grid, fifteen for a diagonal layout, and more where the room is full of corners and pipework. Order the whole job in one batch, because tile shade and calibre vary between production runs, and keep a small box of spares — a cracked tile years later is a ten-minute swap only if its twin from the same batch is waiting.
Sources
Key facts on this page cross-checked against Tile — Wikipedia — background on tiles, their sizes and their use and Grout — Wikipedia — background on grout and the joints between tiles.
Related page
Read next: How Many Pavers Do I Need? Base Gravel & Sand Included — How the Calculator Works.
Comments & ratings
No comments yet.
Be the first to share your experience.