
Guides · Winter containers · Published November 20, 2026 · By Faizan Ahmad
How to Make Winter Porch Pots With Cut Evergreens: A Display That Lasts Until Spring
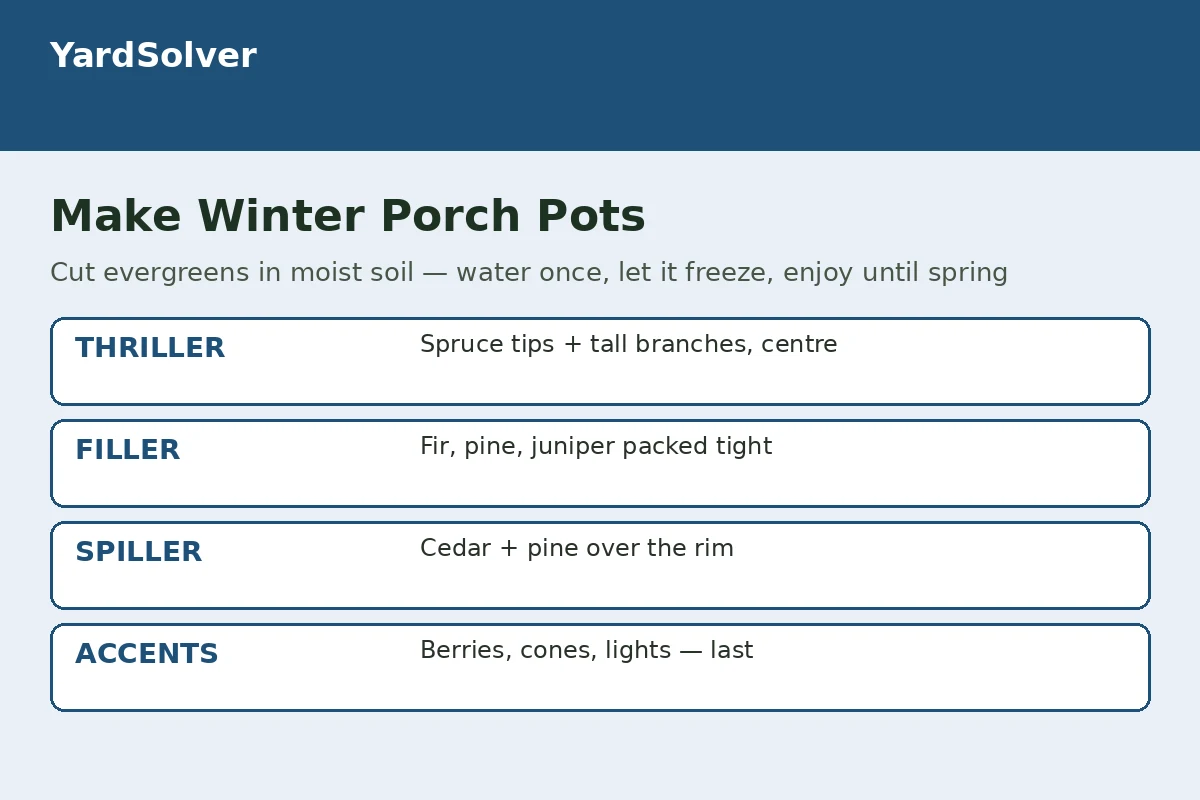
To make a winter porch pot that lasts until spring, reuse a frost-proof container and the soil already in it, push cut evergreen boughs — spruce tips in the centre, fir, pine, cedar and juniper packed around them — deep into moist potting mix, add tall branches and accents, then water the finished pot well so the soil freezes and locks every stem in place. Nothing in this arrangement is alive or needs to survive: you are building, not planting, which is exactly why it works in Winnipeg, Minneapolis and Montreal as reliably as it does in milder coastal cities. Built in late November, a porch pot in a cold climate commonly looks good for three to four months — from the first snow to the spring thaw — for about an hour of work and, if you prune your own evergreens carefully, almost no cost. This guide gives the layer recipe, the greens that hold up longest, the pot materials that survive a freeze, the step order, and the few honest rules for cutting your own branches.
The short answer, on one card
Pot: frost-proof — resin, fiberglass, wood, metal or thick plastic; thin terracotta and glazed ceramic crack outdoors in freezing weather. Base: last season's potting soil, left in the pot and moistened. Recipe: thriller (height) in the centre, filler (evergreen body) packed around it, spiller (soft branches) over the rim, accents last. Depth: stems pushed 15–20 cm (6–8 in) into the mix. Finish: water thoroughly once; in cold climates the frozen soil then holds everything until spring. Timing: build in mid-to-late November, before the soil freezes too hard to work.
Why cut greens, and why November is the month
University of Minnesota Extension guidance, shared through Ask Extension, explains the northern logic plainly: plants do not reliably survive winter in above-ground containers in cold climates, so Minnesota gardeners build winter arrangements from cut evergreen branches instead — cedar, spruce tips and boxwood, with red-twig dogwood, dried hydrangea, winterberry and birch for structure and colour. The arrangement succeeds precisely because it asks nothing to live. Timing is the one real constraint. Boughs go in during mid-to-late November, while the potting mix is still soft enough to push stems into; once the pot freezes solid you cannot rework it, and whatever you built is what greets visitors until March. That constraint is also the gift: frozen soil is the strongest floral foam in the world, and a pot watered in and frozen does not shift, slump or blow apart in a January storm. The quotable version: a winter porch pot is the one container you finish by letting it freeze.
The pot and the base: frost-proof or it cracks
Porous pots are the classic casualty. Terracotta, thin glazed ceramic and hypertufa absorb water, and when that water freezes and expands, the pot cracks or spalls — Minnesota guidance recommends bringing porous containers into a garage for winter or protecting them dry under cover, and choosing wood, resin or plastic for outdoor arrangements. Fiberglass, concrete and metal also hold up well. If your only pot is terracotta, cheat honestly: set a plastic nursery pot inside it and build the arrangement in that. For the base, reuse is the rule on both sides of the border: Illinois and Minnesota advice alike is to keep the soil from your summer or fall container, cut the spent annuals off at soil level, and use the mix — roots and all — as the anchor bed. Old roots actually help, gripping stems like a natural pin holder. If the pot is empty, fill it with potting mix or sand to within about 5 cm (2 in) of the rim, then moisten it well: damp mix grips stems, dry fluffy mix lets them lean and work loose in the first wind.
The layer recipe: thriller, filler, spiller, accents
| Layer | Job | Best materials | Notes |
|---|---|---|---|
| Thriller (centre, tallest) | Height and silhouette, visible from the street | Spruce tips, birch poles, red twig dogwood, curly willow | Push 15–20 cm (6–8 in) deep; finished arrangement about twice the pot's height reads well |
| Filler (body) | Fullness and texture around the centre | Fraser or balsam fir, white pine, spruce, juniper, cedar, boxwood | Mix two or three textures; fir holds up longest, pine adds softness |
| Spiller (rim) | Softness over the edge, hides the pot rim | Cedar, white pine, trailing juniper | Angle stems slightly downward around the front and sides |
| Accents (last) | Colour and detail up close | Winterberry, pinecones, dried hydrangea heads, magnolia leaves, lights, a bow | Add after the greens; swap the bow and ornaments out after the holidays to carry the pot to spring |
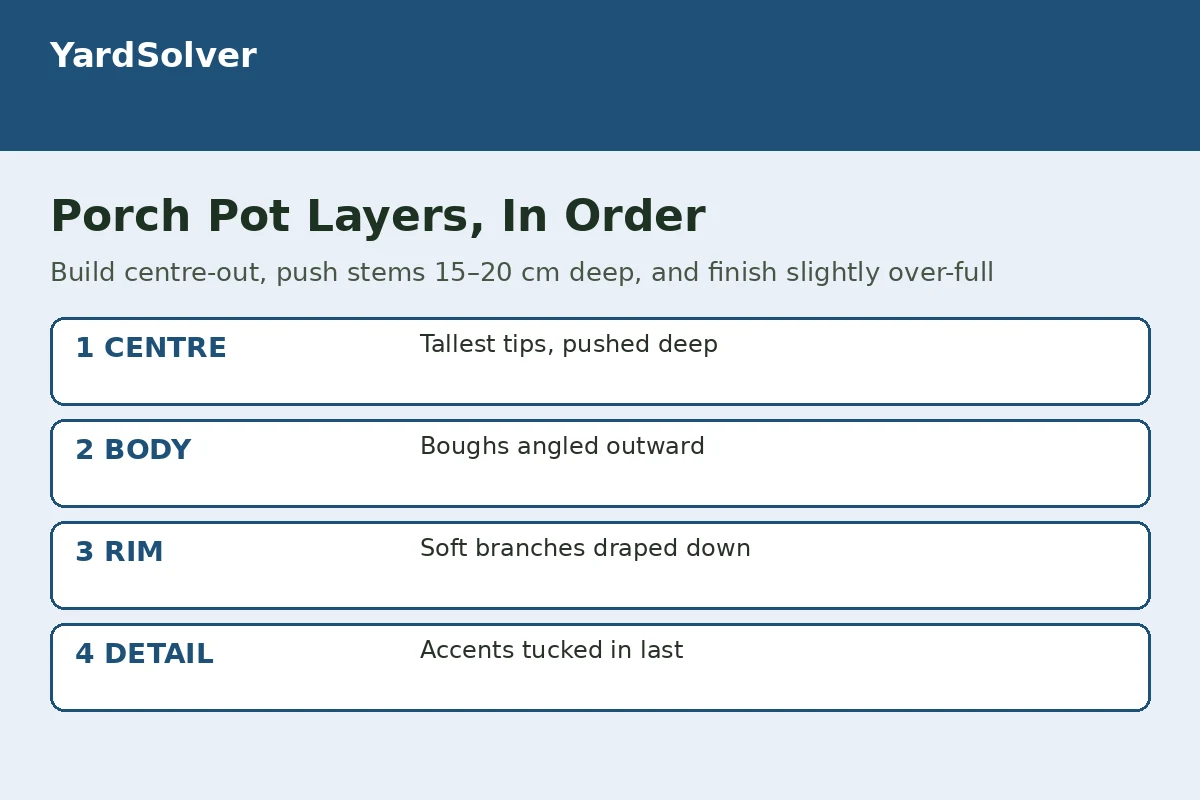
Work in that order and the design mostly makes itself. Set the tallest spruce tip or branch cluster in the centre — or slightly to the back if the pot stands against a wall — then ring it with slightly shorter tips. Pack filler boughs around them at outward angles, cutting fresh ends so the stems seat firmly, and keep adding until no soil shows and the shape looks slightly over-full from the sidewalk; arrangements settle visually over the first week, and every beginner's first pot needs more greens than they expect. Drape the spillers last among the greens, then tuck accents into the structure where they are held by stems, not wire, wherever possible. A pair of matching pots flanking a door can be mirror images or deliberately identical — in winter's flat light, symmetry reads as intention.
Choosing greens: what lasts, what fades, what to cut yourself
Not all evergreens age equally outdoors. Fir — Fraser and balsam especially — is the endurance pick, holding colour and needles for many weeks, which is why it anchors wreaths and garlands too. Spruce tips give the classic miniature-tree shape and stiff structure. White pine is soft, long-needled and graceful at the rim but browns sooner in wind and sun; cedar drapes beautifully and perfumes the doorway; juniper brings blue-green tones and its own berries; boxwood adds a formal, small-leaf texture that photographs well. Canadian garden-centre guidance adds Carolina sapphire, hemlock and Douglas-fir to the mixing list — the principle is three or more textures, never one green alone. Cutting your own is welcome and economical, with two rules that keep it honest gardening rather than slow damage: take a few stems from each shrub or tree, from the back and interior where the gap will not show, never stripping one plant; and never cut the leader or the top of a tree to fake a "spruce tip" — the tips sold in stores are small harvested trees and branch sections, not the crown of someone's specimen spruce. Cut greens the day you build, or keep them in a bucket of water in a cool place for a day or two at most.
Water, weather and carrying the pot to spring
Finish the pot where it will live — a full, wet winter pot is heavy — then water it thoroughly. West Coast garden guidance gives the mild-climate version: water about once a week with cold water while temperatures stay above freezing, because cut greens keep taking up moisture like a cut Christmas tree. In cold climates the routine is simpler: once the soil has frozen, you are done until a long thaw, when another watering before the next freeze refreshes the greens. Shade is the preservative in warm spells and warm regions — a pot on a shaded or north-facing porch outlasts one baking in low winter sun, and moving a pot a metre into shade during a January thaw is the single kindest thing you can do for it. After the holidays, refresh rather than rebuild: pull the ornaments and the bow, leave the greens, dogwood and cones, and the same pot reads as a winter arrangement, not a leftover Christmas one, through February. In spring, compost the greens — they will be genuinely finished by then — and the pot and its soil roll straight into the new season. If a living dwarf conifer in the centre is more your style, treat it as a true container plant, with the two-zones-colder rule from our overwintering guide.
Cost is the last pleasant surprise. A pair of porch pots built from a garden centre's spruce-tip bundles and bagged boughs is a modest purchase; built from your own careful pruning, a bag of winterberry stems and cones gathered after windfalls, it approaches free — and unlike a wreath, which is finished by New Year, the same hour of work is still earning its place at the door in late February. That cost-per-month maths is why porch pots have become the standard winter container across the snow belt: one build, one watering, no feeding, no deadheading, and a front step that looks tended in the months when almost nothing else in the garden can say the same.
Keep going
Protect the living evergreens you cut from with How to Prevent Winter Burn on Evergreens, keep potted plants alive through winter with How to Overwinter Potted Perennials, finish the shutdown with Putting Your Garden to Bed, and plan the month with the December Garden Checklist.
Sources
The cold-climate rationale for cut-evergreen arrangements, the spruce-tip, cedar and boxwood palette and the warning that porous containers crack outdoors follow University of Minnesota Extension via Ask Extension — Outside Containers for the Porch. The three-or-more-greens mixing rule, centre-first build order and weekly cold-water guidance in mild weather follow the Canadian guide at West Coast Gardens — How to Create a Winter Evergreen Planter. Spruce-tip counts per pot and the 15–20 cm stem depth follow Malmborg's — Spruce Tip Pot DIY.
Questions people ask
How long do winter porch pots last?
In a cold climate, a porch pot built in mid-to-late November commonly looks good until the spring thaw — roughly three to four months — because the frozen soil locks the stems and the cold preserves the greens. In mild climates, expect many weeks, extended by weekly watering and a shaded position.
Can I use a terracotta pot for a winter porch pot?
Not safely outdoors where it freezes. Terracotta and other porous pots absorb water that expands as it freezes and cracks them. Use resin, fiberglass, wood, metal or thick plastic — or set a plastic nursery pot inside the terracotta as a liner and build in that.
Do winter porch pots need watering?
Yes, at the start: water the finished pot thoroughly so the moist soil grips the stems and then freezes around them. In cold climates that is usually the only watering until a long thaw. In mild climates, water about once a week with cold water to keep cut greens fresh.
What are the best evergreens for winter porch pots?
Fir (Fraser or balsam) lasts longest, spruce tips give structure and the classic shape, white pine and cedar drape softly over the rim, and juniper and boxwood add texture and colour contrast. Mix at least two or three kinds — a single green looks flat by January.
Can I cut branches from my own trees and shrubs?
Yes, with restraint: take a few stems from each plant, from the back or interior where the gap will not show, and never strip one shrub or cut the leader from a tree. Cut the day you build, or hold stems in a bucket of water in a cool place for a day or two.
When should I make winter porch pots?
Mid-to-late November in cold climates — after summer annuals are finished but before the potting mix freezes too hard to push stems into. Once the pot freezes solid the arrangement cannot be reworked, so build it in its final position.
Comments & ratings
No comments yet.
Be the first to share your experience.